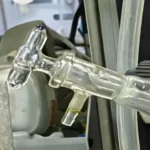
Many technicians and maintenance teams often ask how to properly install press-in grease fittings without leaks or premature failure. Incorrect installation can cause grease blow-out, loose fittings, or even bearing damage—especially in heavy-duty systems. This guide explains the correct installation method so you can ensure secure, reliable lubrication in all industrial applications.
To install a press-in grease fitting, clean the lubrication hole thoroughly, ensure the correct bore size, align the fitting, and tap it straight into place using a socket or drift until fully seated. A properly installed press-in grease fitting must be tight, flush, and positioned to deliver grease directly into the lubrication channel without leakage.
Now that you know the basic steps, let’s explore the complete process, common mistakes, required tools.
How Do You Install a Press-In Grease Fitting?
Installing a press-in grease fitting is a straightforward process, but precision matters. Unlike threaded fittings, a press-in type relies entirely on interference fit—the slight difference in diameter between the fitting and the bore creates mechanical holding force. To install correctly:
Clean the Hole Thoroughly
Remove old grease, metal chips, rust, and coatings. A dirty bore prevents proper seating and results in grease leakage.
Verify Bore Size
Standard press-in fittings usually require a slightly undersized hole (for example 0.216–0.219 inches for a 7/32″ drive-type zerk).
If the bore is worn or oversized, the fitting will loosen prematurely.
Choose the Right Tool
Use a socket or installation drift that matches the fitting head. Never strike the fitting directly with a hammer—this can deform the ball check valve.
Tap the Fitting Straight Into Place
Apply controlled taps using a hammer or press until the fitting’s shoulder is flush with the housing.
The fitting should not rotate or move when pulled lightly.
Test With Grease
Pump grease into the fitting to confirm proper flow into the bearing, cavity, or lubrication channel.
WalterValves’ industrial customers—especially bearing manufacturers, heavy equipment OEMs, and hydraulic system builders—use this procedure to ensure durable lubrication points in high-vibration environments.
What Tools Do You Need to Install a Press-In Grease Fitting?
Technicians sometimes attempt to install fittings with makeshift tools, which increases the risk of damage. For clean and professional installation, prepare the following:
Essential Tools
- Hammer (preferably a small ball-peen or dead-blow type)
- Socket or installation drift sized to the fitting head
- Cleaning brush (nylon or brass)
- Compressed air
- Solvent or degreaser
- Calipers / bore gauge
- Grease gun for testing
Optional Tools
- Hydraulic or arbor press for precision installations
- Magnetic debris collector for steel housings
- Flashlight or inspection mirror for tight spaces
Using the right tools is especially important in critical environments such as aerospace assemblies, precision machining equipment, actuator housings, and high-pressure valve blocks—many of which WalterValves supplies.
How Do You Prepare the Hole Before Installing a Grease Fitting?
A press-in fitting depends on bore condition. Preparation is as important as the installation step itself.

Remove Old Grease and Contamination
Use solvent and a brush to remove:
- Old petroleum grease
- Hardened debris
- Corrosion
- Paint or coatings
- Metal shavings
Inspect the Bore
Check for:
- Ovality
- Burrs
- Cracks
- Pitting
- Oversizing
If severe wear exists, a press-in fitting may not hold. In such cases, OEMs or repair shops often switch to a threaded zerk, which WalterValves also supplies in various sizes and materials.
Deburr the Edge
A small chamfer helps guide the fitting and prevents metal from folding over during installation.
Proper preparation ensures:
- Leak-free lubrication
- Longer fitting lifespan
- Reduced maintenance downtime
How Tight Should a Press-In Grease Fitting Be?
A press-in grease fitting should be tight enough that:
- It cannot be removed by hand
- It does not rotate under torque from a grease gun
- It remains secure under vibration
A properly installed fitting will feel completely rigid. If it can be wiggled or pulled out with moderate force, the hole is likely oversized.
Signs of a good installation:
- The head is flush with the surface
- The fitting pumps grease with no leakage
- The fitting remains straight
- The fitting does not loosen during operation
Signs of a bad installation:
- Grease leaks around the base
- The fitting sits crooked
- The bore cracks
- The fitting pops out during pumping
For industrial environments—such as bearing housings in conveyor systems, steel mills, mining equipment, or manufacturing robotics—tightness is crucial to lubrication reliability.
Can You Replace a Press-In Grease Fitting With a Threaded One?
Yes, many technicians replace press-in fittings with threaded fittings, especially if the bore becomes worn.
How to convert a press-in hole to threaded
- Drill the bore to correct tap size
- Tap threads (e.g., 1/4″-28 SAE-LT, M6, M8)
- Clean thoroughly
- Apply thread sealant if necessary
- Install the threaded fitting
- Test with grease
Many mechanics prefer threaded fittings for
- Heavy-vibration environments
- High-pressure grease systems
- Repeated maintenance access
- Equipment subject to shock loads
WalterValves’ grease fittings and check fittings are available in both drive-in and threaded configurations, making conversion easy for OEMs and repair shops.
What Are the Most Common Mistakes When Installing Press-In Grease Fittings?
Understanding what not to do helps prevent downtime and equipment failure. Common mistakes include:
Installing Into a Dirty Hole
Contamination prevents the fitting from seating properly.
Using the Wrong Size Fitting
If the interference is too small, the fitting loosens; too large, and the housing cracks.
Hammering the Fitting Directly
This can crush the ball check mechanism and block grease flow.
Driving the Fitting at an Angle
Leads to misalignment, grease leakage, and internal channel blockage.
Over-Driving the Fitting
Drives the body too deep, deforming the bore.
Ignoring Bore Damage
A worn bore can never secure a press-in fitting; it must be repaired or tapped.
No Lubrication Test After Installation
Testing ensures grease flows into the lubrication path rather than spilling externally.
These errors are common in factories, workshops, and repair environments—especially when inexperienced technicians perform lubrication system installations.
Full Step-By-Step Guide: Installing Press-In Grease Fittings Correctly
Below is a comprehensive procedure commonly used by OEMs, maintenance departments, and industrial equipment builders.
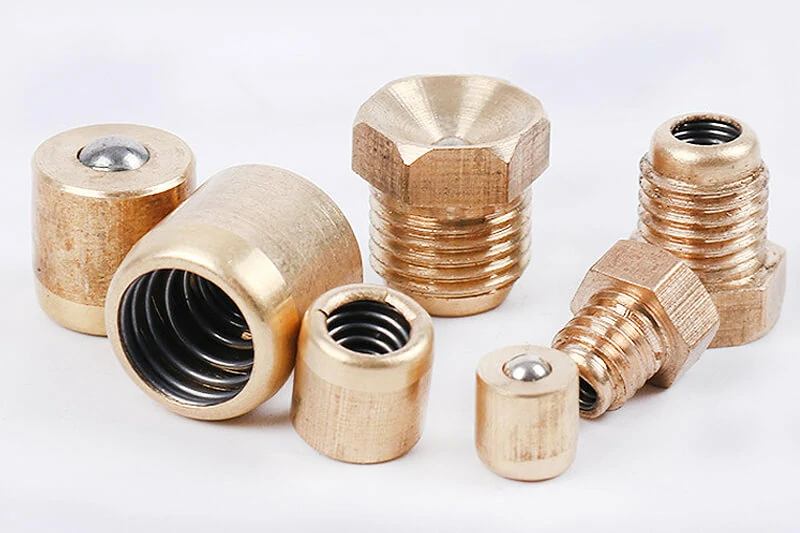
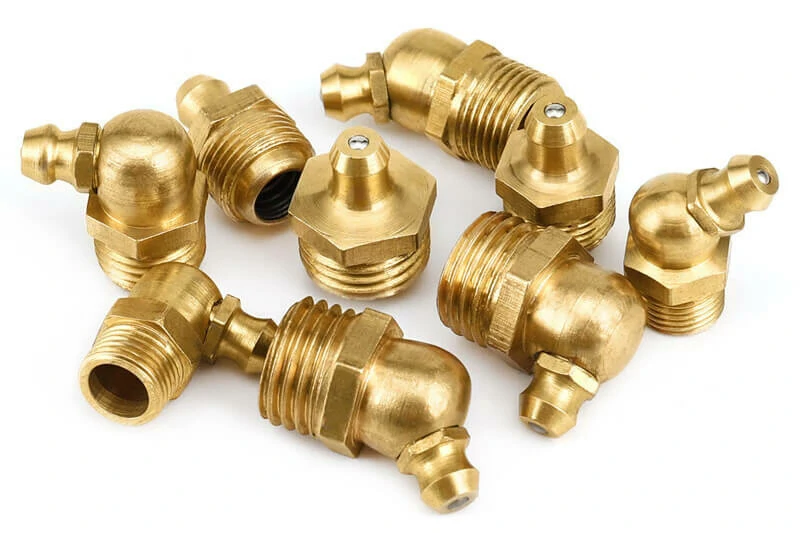
Step 1: Identify the Correct Fitting Type and Size
Press-in fittings come in different configurations:
Drive-type smooth shank
Barbed shank
Straight, 45°, or 90° orientation
Steel, stainless steel, brass
Match the fitting to:
Housing material
Operating pressure
Orientation required for grease gun access
Space limitations
WalterValves supplies multiple types suitable for bearing housings, hydraulic blocks, valves, and mechanical linkages.
Step 2: Clean and Prepare the Bore
Use solvent, brushes, and compressed air to remove contamination.
Deburr edges and measure the bore precisely using calipers.
A clean bore ensures proper interference fit and prevents grease bypass.
Step 3: Align the Grease Fitting
Position the fitting perpendicular to the hole.
Avoid any tilting or twisting—misalignment will compromise performance.
Step 4: Drive the Fitting Straight In
Place a socket or drift over the head.
Tap lightly with a hammer, increasing force gradually.
Stop when the shoulder is flush.
Ensure the fitting body is not crushed; the check ball must remain functional.
Step 5: Inspect the Installation
Verify the fitting is:
Straight
Fully seated
Tight
Not rotating
Free of cracks
Check the surrounding housing for deformation.
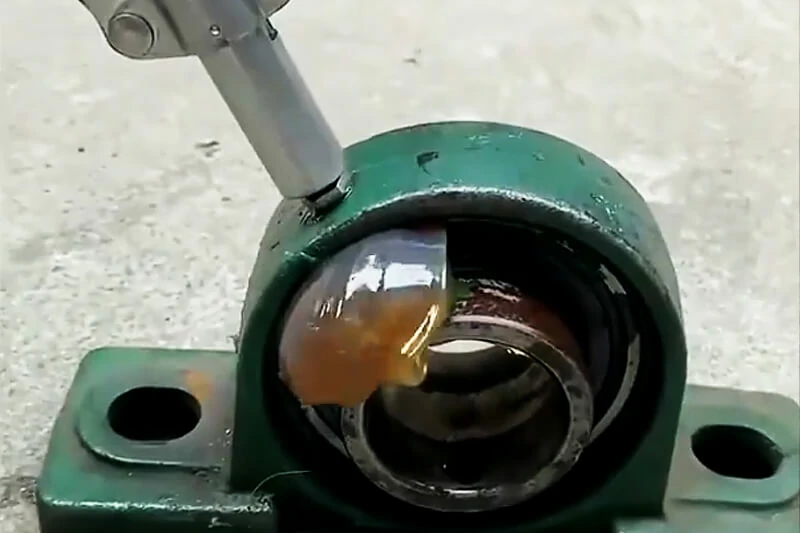
Step 6: Test with Grease
- Pump grease until:
- You feel resistance
- Fresh grease exits the relief point or bearing
- No grease leaks around the fitting
- If grease flows around the base, reseat the fitting or replace it.

Conclusion
Installing a press-in grease fitting is essential for maintaining smooth and reliable operation of mechanical equipment—especially in bearings, housings, hydraulic blocks, and industrial machinery. By cleaning the bore, selecting the correct size, driving the fitting straight, and testing with grease, maintenance teams can prevent leaks, reduce downtime, and ensure long-term lubrication performance.
If you found this guide helpful or have installation questions, feel free to comment, share, or reach out directly to info@waltervalves.com for technical support and wholesale inquiries.