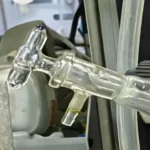
Промышленные жидкостные системы отличаются точностью и надежностью, но даже самые лучшие компоненты выходят из строя, если их неправильно установить. Многие инженеры испытывают трудности с установкой игольчатых клапанов, что приводит к утечкам, перепадам давления или отказу клапана. Эти проблемы могут остановить работу и создать угрозу безопасности. К счастью, правильная установка игольчатого клапана не представляет собой ничего сложного, если следовать правильному процессу. Это руководство проведет вас через каждый шаг, подчеркнет лучшие практики и поможет избежать дорогостоящих ошибок.
Игольчатый клапан Установка требует проверки совместимости, очистки соединений, нанесения резьбового герметика при необходимости, выравнивания направления потока, тщательной затяжки и проверки герметичности. Правильная установка обеспечивает надежное управление потоком и предотвращает выход системы из строя
Независимо от того, обслуживаете ли вы существующие системы или устанавливаете новую линию, давайте подробнее разберемся, как сделать это правильно.
Какие инструменты нужны для установки игольчатого клапана?
Перед началом работы соберите необходимые инструменты и материалы, чтобы обеспечить беспроблемный процесс установки:
Основные инструменты
Трубный или открытый гаечный ключ
Динамометрический ключ (рекомендуется)
Тефлоновая лента или трубный клей (для резьбовых соединений)
Мыльный раствор или спрей для обнаружения утечек
Чистая безворсовая ткань
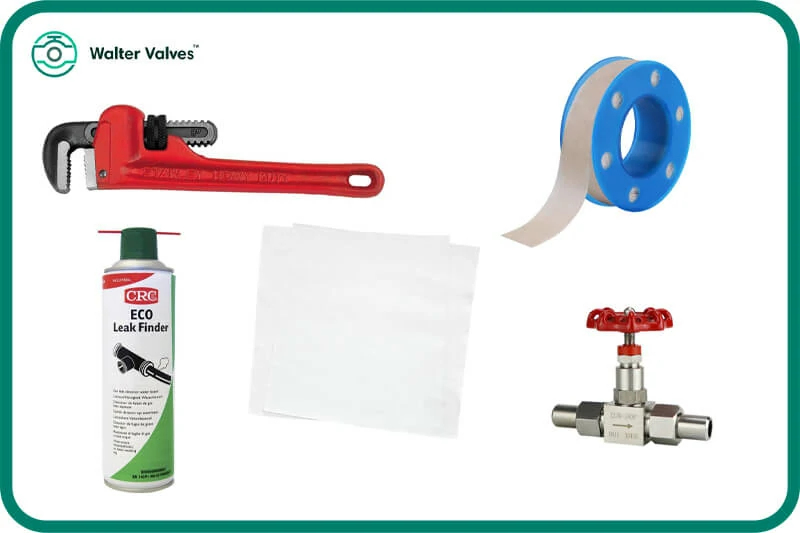
Контрольный список материалов
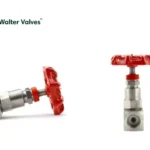
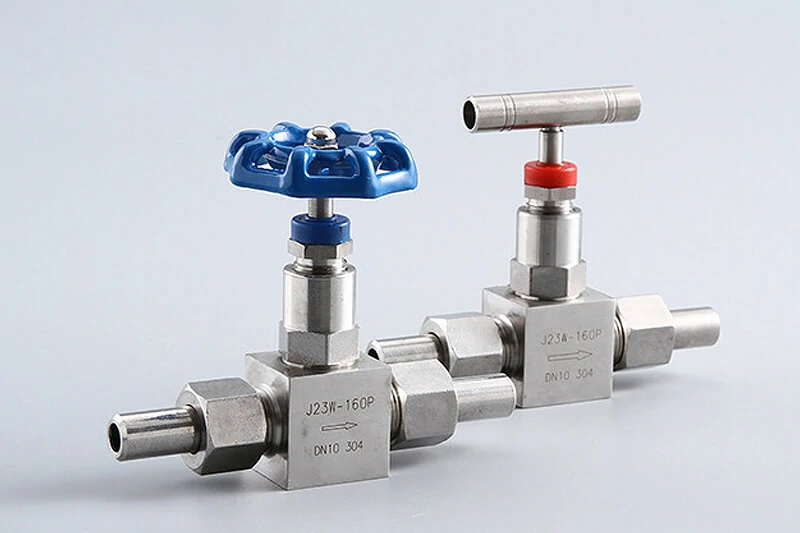
Игольчатый клапан (подтвердите размер, материал, номинальное давление)
Совместимые трубные фитинги (наружная/внутренняя резьба, трубные фитинги)
Смазка или противозадирный состав (если рекомендовано производителем)
Как подготовиться к установке игольчатого клапана?
Подготовке часто не уделяют должного внимания, но это один из самых важных этапов в предотвращении ошибок при установке.
Подтверждение технических характеристик клапана
Убедитесь, что выбранный игольчатый клапан соответствует требованиям вашей системы:
Тип соединения: NPT, BSPT, BSPP, компрессионные, сварные
Размер: Распространенные размеры: 1/8″, 1/4″, 1/2″ и 1″.
Материал: Нержавеющая сталь, латунь или специальные сплавы
Номинальное давление: Обычно 3,000-6,000 PSI для промышленного использования
Тип уплотнения: PTFE, металл-металл или эластомерные
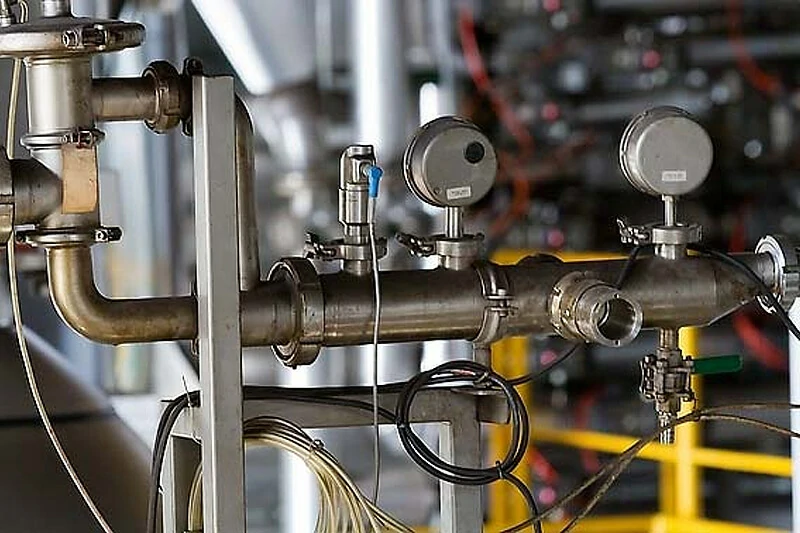
На сайте ВальтервальвыМы предлагаем широкий ассортимент игольчатых клапанов, проверенных на воздействие высокого давления и агрессивных сред, подходящих для таких отраслей промышленности, как нефтегазовая, химическая и приборостроительная.
Очистите торцы труб и клапанов
Перед установкой:
Удалите весь мусор, пыль и влагу.
Осмотрите резьбу на предмет заусенцев или повреждений.
Протирайте поверхности сухой тканью без ворса.
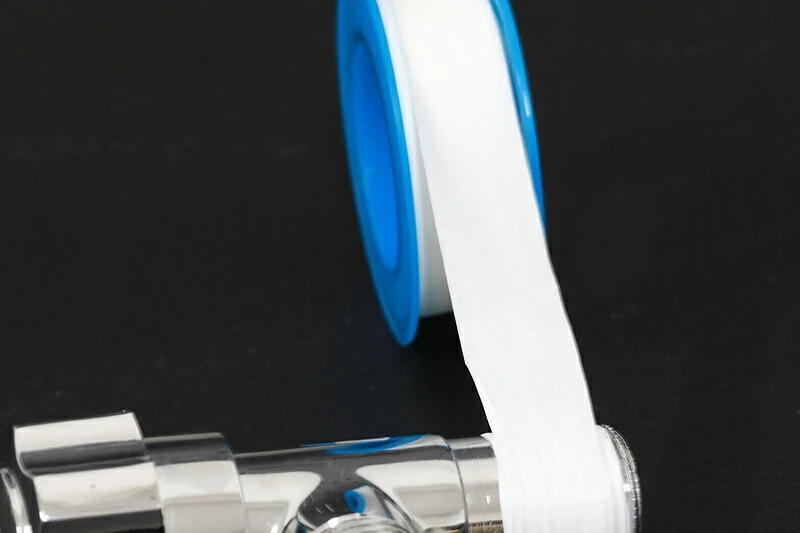
Нанесите герметик для резьбы (если применимо)
Для резьбовых концов:
Используйте Фторопластовая лента: Оберните по часовой стрелке вокруг наружной резьбы 2-3 раза.
Для трубный клейНанесите тонкий слой только на наружную резьбу.
Не используйте герметик для компрессионных или развальцованных фитингов.
Как установить игольчатый клапан?
Вот основная пошаговая процедура безопасной и правильной установки игольчатого клапана:
Шаг 1: Выравнивание клапана
Расположите клапан так, чтобы стрелка направления потока на корпусе совпадает с предполагаемым путем движения жидкости. Игольчатые клапаны обычно двунаправленные, но в некоторых моделях выравнивание по направлению обеспечивает оптимальную производительность.
Шаг 2: Сначала затяните вручную
Вкручивайте клапан в фитинг или трубу вручную, чтобы избежать перекрестной резьбы. Ручная затяжка обеспечивает правильное выравнивание и снижает риск повреждения резьбы.
Шаг 3: Используйте гаечный ключ для фиксации
Используйте трубный или гаечный ключ, чтобы надежно затянуть клапан. Если производитель указывает крутящий момент (например, 30-35 Нм для клапанов 1/2" SS), используйте динамометрический ключ для точности.
Избегайте чрезмерной затяжки-это распространенная причина растрескивания или деформации клапана.
Шаг 4: Выполните проверку на герметичность
После установки клапана на место:
Медленно нагнетайте давление в системе.
Нанесите мыльный раствор на стыки и резьбу.
Ищите пузырьки, указывающие на утечку.
При необходимости затяните еще немного, но не давите.
Для газовых системИспользуйте сертифицированные жидкости для обнаружения утечек.
Шаг 5: Проверка работы клапана
Поверните маховик, чтобы убедиться в плавности движения открытия/закрытия. Убедитесь, что клапан полностью закрывается и открывается без препятствий и сопротивления.
Советы по установке по сценарию применения
| Приложение | Рекомендуемая практика |
| Приборные системы | Используйте компрессионные фитинги с двойной ферулой для узких мест |
| Нефте- и газопроводы | Выберите клапаны, рассчитанные на 6000+ PSI и экстремальные температуры |
| Очистка воды | Выберите латунь или SS с уплотнениями EPDM |
| Химическая обработка | Всегда проверяйте химическую совместимость с материалом уплотнения |
| Чистое помещение/лаборатория | Используйте клапаны, очищенные и упакованные для работы в условиях высокой чистоты |
Распространенные ошибки при установке (и как их избежать)
| Ошибка | Риск | Совет по профилактике |
| Использование неправильного типа резьбы (например, BSP против NPT) | Утечка, повреждение резьбы | Всегда проверяйте стандарт резьбы и используйте подходящие детали |
| Чрезмерная затяжка фитингов | Деформация, растрескивание, внутренние повреждения | Используйте динамометрический ключ или затягивайте согласно спецификации |
| Пропуск проверки герметичности | Незамеченные утечки, неэффективность системы | Всегда проводите испытание мыльным пузырем или давлением |
| Игнорирование направления потока | Нарушение регулирования, невозможность отключения | Проверьте стрелку на корпусе клапана или в техническом описании |
| Использование резьбового герметика на компрессионных концах | Забитые порты, неправильное уплотнение | Наносите герметик только на коническую наружную трубную резьбу |
Сколько времени требуется для установки игольчатого клапана?
Для квалифицированного специалиста установка обычно занимает:
15-30 минут для резьбовых клапанов
10-20 минут для клапанов компрессионного типа или клапанов, монтируемых на панели
В тесных помещениях или агрессивных средах, требующих применения СИЗ или процедур очистки, может потребоваться больше времени.
Обслуживание после установки
Правильное обслуживание продлевает срок службы и работоспособность клапана:
Периодически переключайте клапан для предотвращения прилипания
Очистите внешнюю поверхность клапана при воздействии коррозионной или пыльной среды
Проверьте уплотнения на предмет износа или утечек
Замените изношенные компоненты с комплектами OEM
Waltervalves предлагает долгосрочные поставки запасных частей для всех моделей игольчатых клапанов.
Заключение
Правильная установка игольчатых клапанов необходима для безопасного, надежного и точного управления жидкостями в промышленных установках. От выбора правильного типа соединения до испытания на герметичность и проверки работоспособности - соблюдение структурированного процесса обеспечивает долгосрочную целостность системы.
Если вы ищете игольчатые клапаны промышленного класса, Вальтервальвы доставляет:
Клапаны, рассчитанные на высокое давление (до 6 000 PSI)
Варианты из нержавеющей стали, латуни и сплавов
Модели с резьбовым, компрессионным и панельным креплением
Прямые заводские цены и быстрая доставка по всему миру
Нужен совет эксперта по выбору продукта или установке? Мы готовы помочь.
Свяжитесь с Waltervalves сегодня
Электронная почта: info@waltervalves.com
Обслуживание: OEM & ODM поддержанный | глобальная доставка | 24h ответ цитаты
ЧАСТО ЗАДАВАЕМЫЕ ВОПРОСЫ
Можно ли установить игольчатый клапан в любой ориентации?
Да. Игольчатые клапаны могут быть установлены вертикально или горизонтально. Однако:
Вертикальная установка предпочтительна, если важна гравитация или дренаж.
Для предотвращения износа избегайте монтажа с чрезмерной нагрузкой на шток.
Какое направление потока правильно для игольчатого клапана?
Проверьте корпус клапана на наличие стрелки. Хотя многие игольчатые клапаны являются двунаправленными, некоторые конструкции оптимизируют поток и уплотнение в одном направлении.
Нужна ли смазка игольчатым клапанам?
Как правило, игольчатые клапаны не требуют смазки. Однако в системах с высоким давлением или высокой температурой некоторые производители рекомендуют наносить легкий слой смазки на шток или резьбу, чтобы облегчить работу и уменьшить износ.
Насколько тугим должен быть игольчатый клапан?
Затяните клапан до упора, затем нанесите еще один 1/4 - 1/2 оборота с помощью гаечного ключа. Всегда следуйте указаниям по крутящему моменту, если таковые имеются. Чрезмерное затягивание может повредить седло или резьбу, что приведет к утечке или преждевременному выходу из строя.
Что произойдет, если установить игольчатый клапан задом наперед?
Несмотря на то, что многие модели продолжают работать, их установка в обратном порядке может привести к повреждению:
Влияние на эффективность регулирования расхода
Причина неправильного перекрытия или утечки
Увеличение турбулентности или шума
Всегда соблюдайте направление потока, чтобы обеспечить точное дозирование.
Как часто следует проверять установленные игольчатые клапаны?
Проверка зависит от условий эксплуатации. Для критически важных систем:
Ежемесячно инспекции идеально подходят для работы под высоким давлением или с агрессивными средами
Ищите признаки износа, утечки или жесткость ручки.
При необходимости замените уплотнения или весь клапан.